


Appliance installation
This chapter covers installing WireShield on a server, the first-boot wizard and the first sign-in.
1.1 Requirements
| Item | Requirement |
|---|---|
| Boot | UEFI (Legacy/BIOS is not supported). Secure Boot must be off. |
| Disk | One disk is enough (SSD recommended). At least ≈ 8 GB; audit logs, series, reports and PCAP files accumulate on the data partition, so 64 GB or more is recommended. The data partition grows to the whole disk automatically after installation. For RAID-1, create a logical drive on the RAID controller first; the installer sees a single block device. |
| Console | Monitor and keyboard, iLO/iDRAC remote console (graphical) or serial console (115200 8N1). The wizard works on all of them. |
| Network cards | Drivers with native XDP support. |
| Ports | At least one data port (XDP attaches here) and, recommended, a separate management port. Dual-port routed inline needs two data ports. On a single-port POP, management and data share one port. |
| SFP+ | Some HPE cards reject non-HPE modules; use approved or compatibly coded modules. Intel ixgbe is configured to accept unsupported SFP modules. |
1.2 Installation files
You receive two files:
wireshield-installer-<version>.iso(≈ 0.6 GB) — hybrid UEFI installer ISOwireshield-installer-<version>.iso.sha256— checksum
Verify the file first:
# macOS / Linux
shasum -a 256 -c wireshield-installer-<version>.iso.sha256
# Windows
certutil -hashfile wireshield-installer-<version>.iso SHA256
The ISO can be used in three ways: USB stick, the server's virtual media (iDRAC/iLO) or DVD.
1.3 Preparing a USB stick (at least 2 GB)
Windows (Rufus):
- Open Rufus and pick the
.isowith SELECT. - Partition scheme GPT, target system UEFI (non CSM), file system FAT32.
- Press START. If Rufus reports an "ISOHybrid image", choose ISO Image mode (recommended) or DD Image mode; both work.
macOS:
diskutil list                       # find the USB stick's /dev/diskN (wrong disk = data loss)
diskutil unmountDisk /dev/diskN
sudo dd if=wireshield-installer-<version>.iso of=/dev/rdiskN bs=4m
diskutil eject /dev/diskN
Linux:
lsblk
sudo dd if=wireshield-installer-<version>.iso of=/dev/sdX bs=4M status=progress conv=fsync
1.4 Installing from virtual media (Dell iDRAC / HPE iLO)
- Open the server's remote console (iDRAC: Virtual Console; iLO: Remote Console).
- Under Virtual Media, attach the ISO as a CD/DVD (iLO: Virtual Media → CD/DVD → Local .iso file).
- Power on and pick the virtual CD/DVD in the one-time boot menu (Dell: F11 Boot Manager; HPE: F11 Boot Menu).
1.5 Installation steps
- In the BIOS/UEFI settings, make sure UEFI mode is on and Secure Boot is off.
- Boot from USB or the virtual CD. A GRUB menu appears first (it starts automatically after 5 s; the second entry is for the serial console).
- The WireShield - Installer screen lists target disks. The installer medium itself and very small disks are not listed. Check the disk model, size and the
WARNING: contains N partition(s)notice. - Enter the disk number, then type
YESin capitals. Any other answer cancels. The selected disk is erased completely. - The installer writes the image, reads it back and verifies it with SHA-256, adds a UEFI boot entry and prints
INSTALLATION COMPLETE. - Remove the USB stick (or detach the virtual CD) and press Enter. The server reboots.
Keys on the installer screen: r = list disks again, k = rescue shell (for diagnosis), q = reboot.

Console — "WireShield - Installer" disk list and YES confirmation 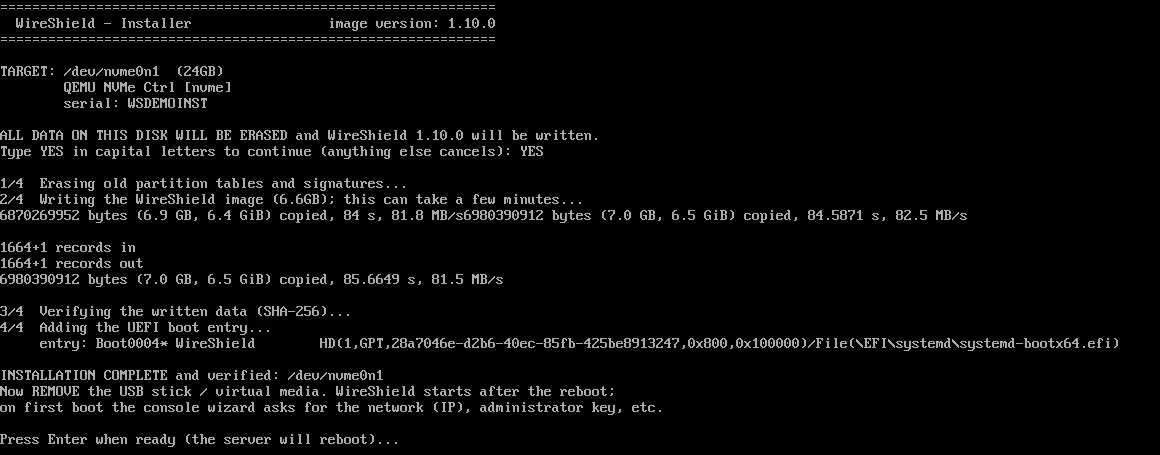
Console — "INSTALLATION COMPLETE" message
1.6 First-boot wizard
On first boot, the installed system starts the WireShield first-time setup wizard on the console (VGA/iLO/iDRAC and serial).
- Network cards that are down are brought up and the wizard waits up to 12 s for link (
Detecting network links...). - Physical interfaces are listed: name, MAC, driver and
LINK UPif a cable is connected. For 10G/SFP+ links that come up late, type?at an interface question to rescan. An interface name that is not in the list is refused. - Answer the questions:
| Console question | Meaning |
|---|---|
Hostname | Appliance name (RFC 1123, e.g. edge-01). |
Data interface (customer traffic; XDP attaches here) | The port customer traffic arrives on. It gets no IP address but is brought up automatically. |
Management interface (a separate port; or the data interface itself for a single-port POP) | Management port. If you enter the data interface, the wizard asks Use one port for both (yes/no). |
Management address mode: static | dhcp | With static, the wizard asks Management address (CIDR) (e.g. 192.0.2.10/24) and Gateway (empty = none). |
(single-port mode) Management address (CIDR; e.g. 198.51.100.10/32), ISP link address on this port (CIDR, e.g. 203.0.113.2/31; empty = none), Gateway (ISP router) | A separate management address that your ISP routes to this port, the ISP link address and the ISP router. |
DNS servers (space separated) | DNS servers. Name resolution is needed for certificates, GeoIP updates and feeds. Can be changed later in the panel (Chapter 3.8). |
NTP servers (space separated; empty = …) | If empty, default NTP servers given by IP address are used. If the clock is wrong, 2FA codes do not match. |
Management TLS port | Web interface and API port (default 8443), listening only on the management interface. |
Customer portal TLS port (0 = disabled) | Local customer portal on the appliance. 0 if you use a separate portal server. |
wsadmin SSH public key (single line; empty = add later) | Optional SSH key (ssh-ed25519 AAAA…). SSH also works with the password. |
wsadmin console password (…; empty = set it at the first console login) | Optional. If empty, the password is set at first sign-in (see 1.7). |
Allowed management networks (CIDR, space separated; …) | Networks allowed to reach SSH and the web interface (e.g. 198.51.100.0/24). Filling this in is recommended: until the password is set, anyone in these networks can set the first password. Required in single-port mode. Can be changed later from the panel (1.9). |
Separate portal server: customer portal upstream port (0 = disabled) / … MSSP upstream port (0 = disabled) | Ports for a separate portal server. Leaving 0 here and configuring it later in the panel is recommended (Chapter 2). If you enable them here, the portal server's IP addresses and client certificate fingerprints are also required. |
- When the wizard finishes, the BACKUP PASSPHRASE is shown once. Backups cannot be opened without it. Store it offline in a safe place, then press Enter.

Console — wizard interface list (name, MAC, driver, LINK UP) 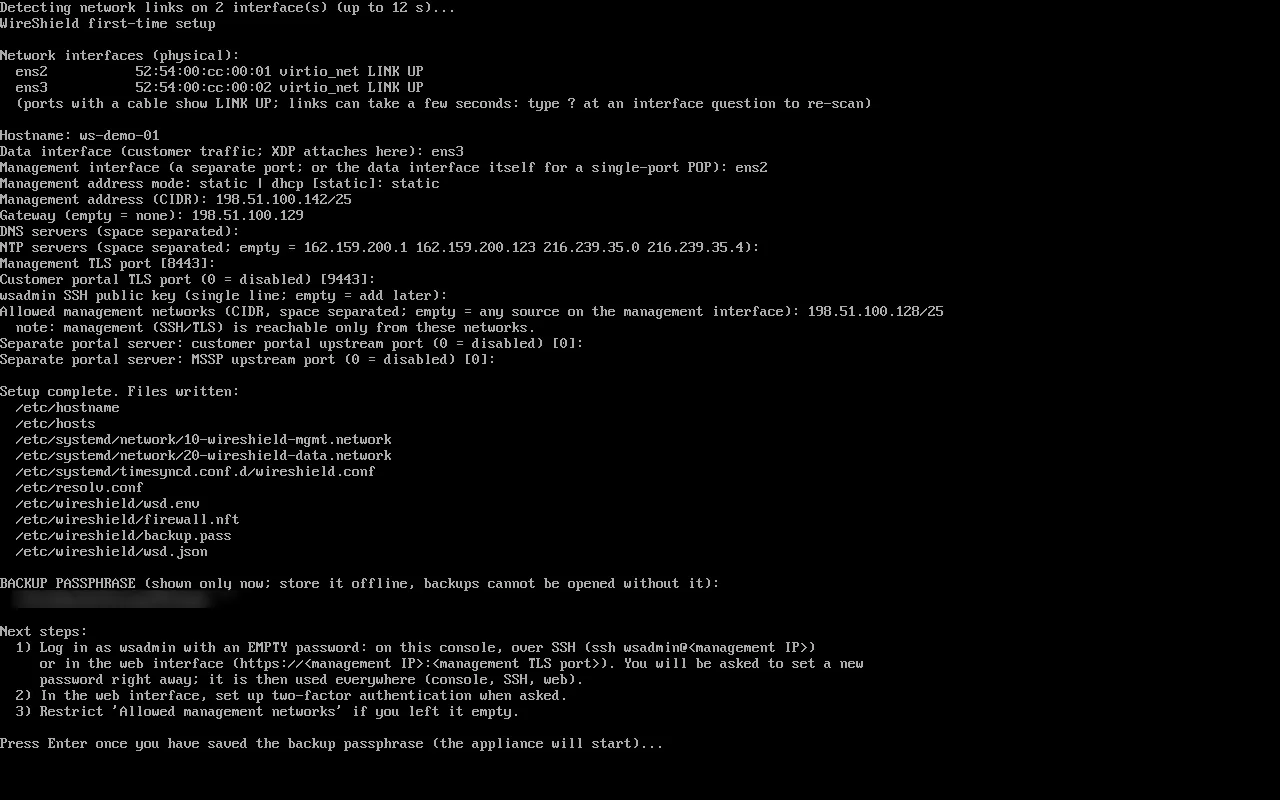
Console — "BACKUP PASSPHRASE" screen (passphrase blurred)
1.7 First sign-in — one account, one password (wsadmin)
The user name is wsadmin everywhere. If you did not set a password in the wizard, the password is empty at first sign-in:
- Console:
login: wsadmin, no password prompt. - SSH:
ssh wsadmin@<management-ip>, press Enter at the password prompt. - Web:
https://<management-ip>:8443, userwsadmin, empty password, Sign in.
Wherever you sign in, you must set a new password right away (at least 12 characters; it must not contain the user name; well-known weak passwords are refused). The password then works on the console, SSH and web. After it is set, an empty password is never accepted.
Keep the wsadmin password in a password vault. If it is lost (or the administrator's 2FA), it can be reset on the physical or remote console with the recovery user and a one-time code from WireShield support; a factory reset is also available there (Chapter 13.10).
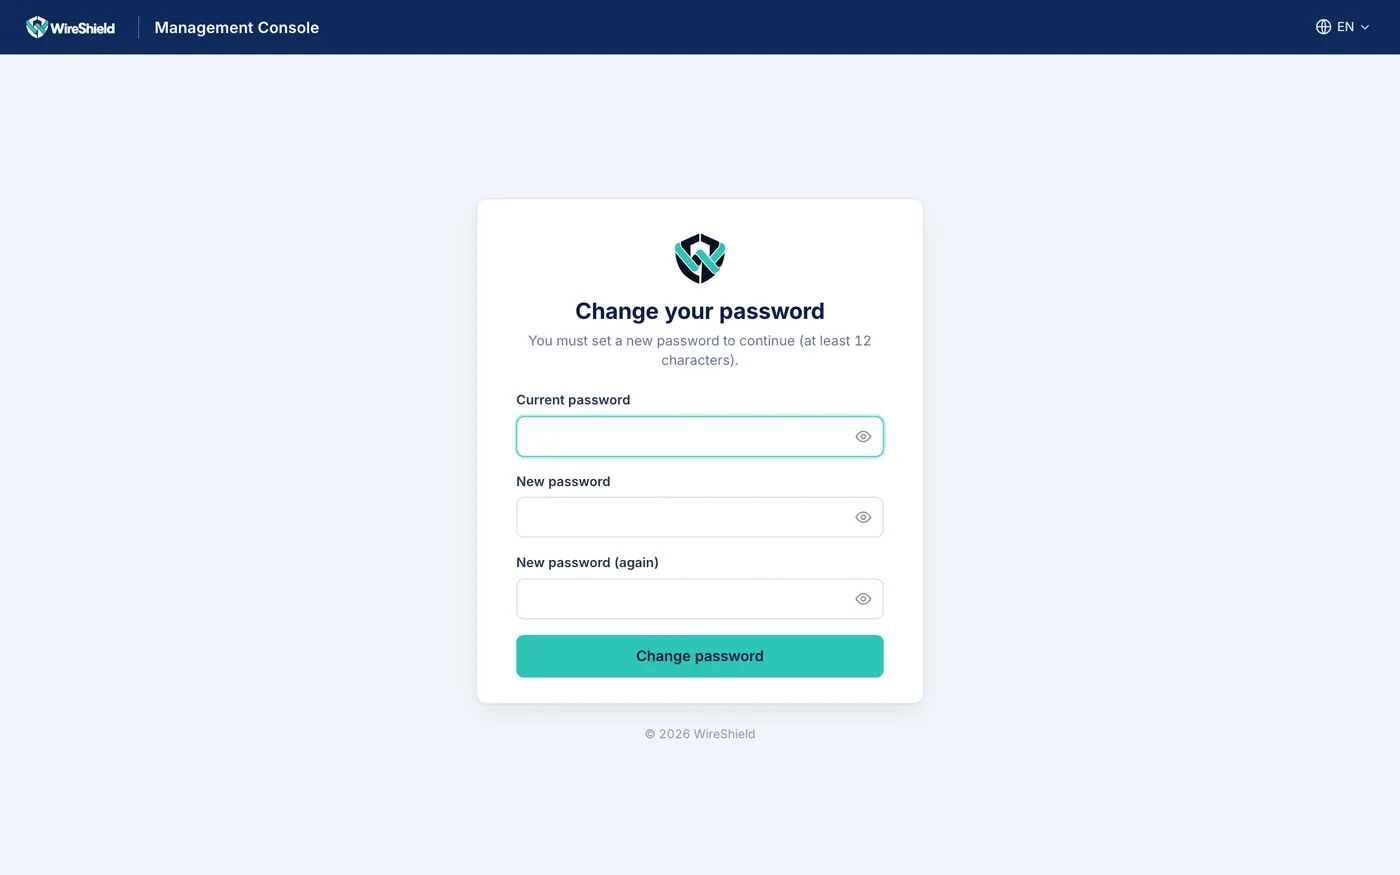
Web — "Change your password" screen
1.8 Setting up two-factor authentication (2FA)
At the first web sign-in you are asked to set up two-factor authentication:
- On Set up two-factor authentication, press Start setup.
- Scan the QR code with an authenticator app (Google/Microsoft Authenticator, 1Password, …) or enter the secret key manually.
- Enter the 6-digit code from the app and press Verify and enable.
- Store the 10 recovery codes somewhere safe. Each works once and they are not shown again. If you lose your phone, enter a recovery code in the 2FA field on the login page.
The screen shows the appliance time. If it differs from your computer's time a warning appears; codes will not match until the appliance clock is corrected (set NTP, or set the BIOS clock to UTC).
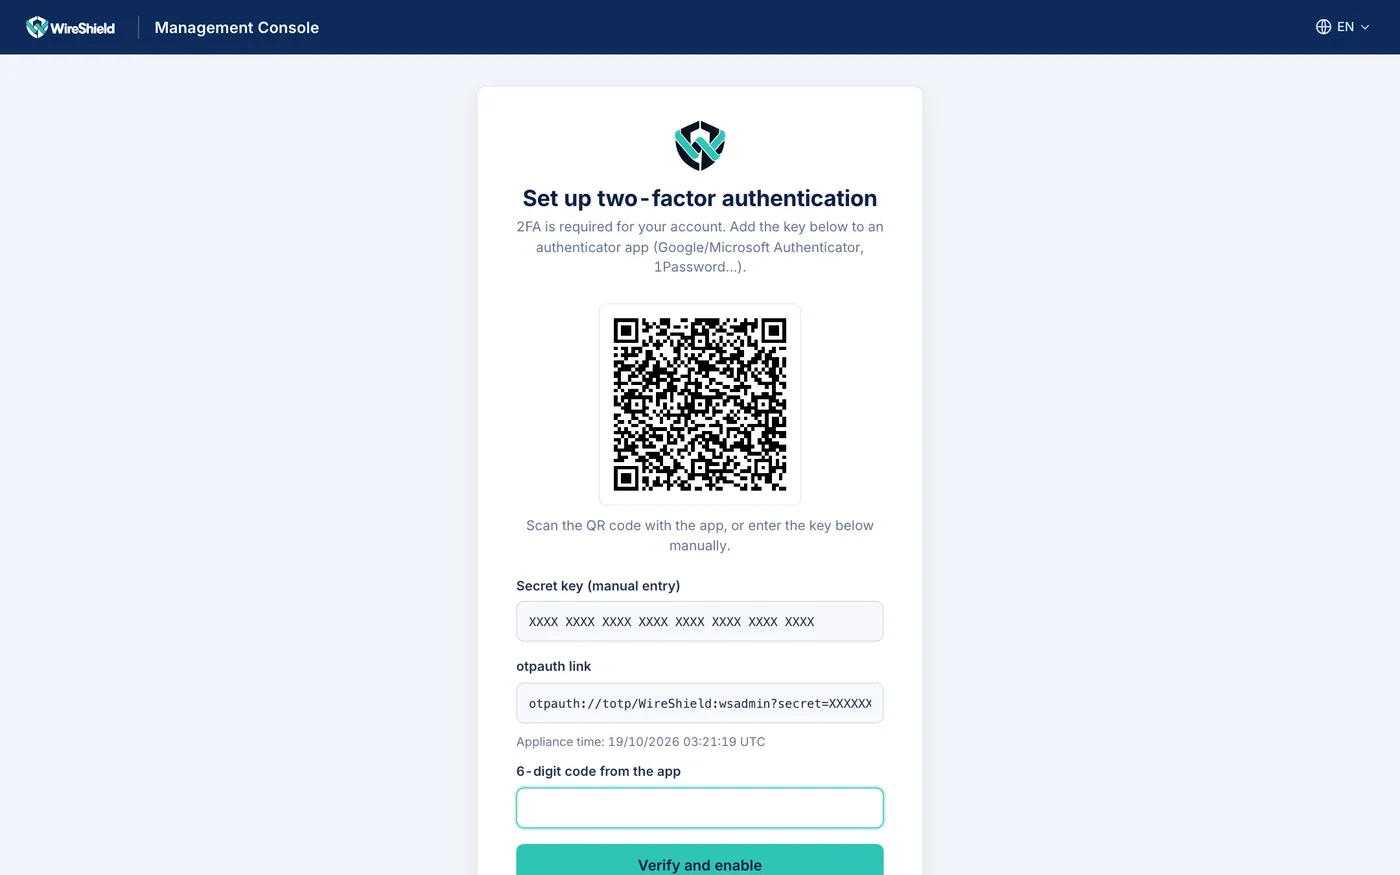
Web — 2FA setup with QR code and appliance time 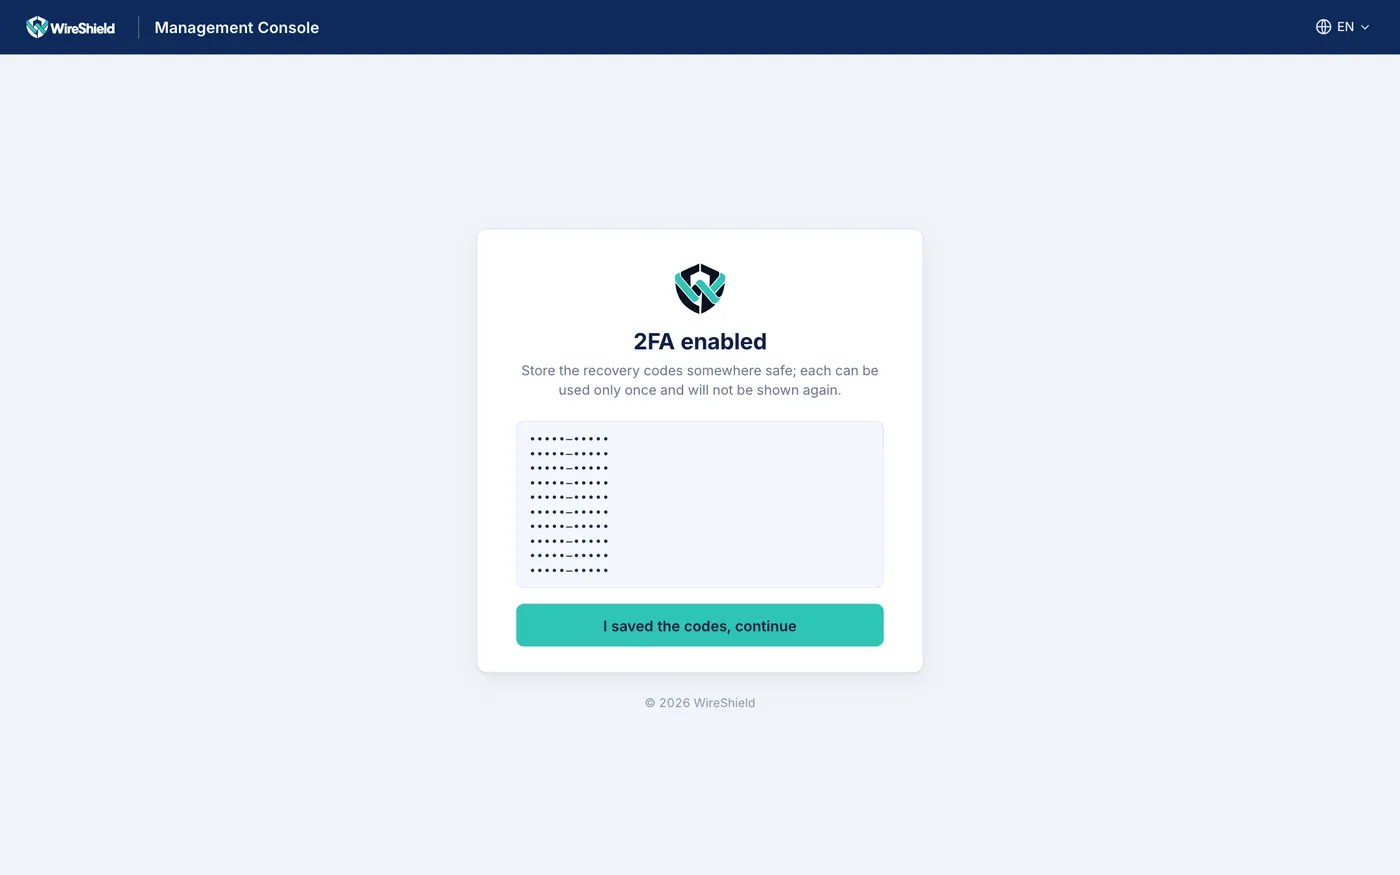
Web — recovery codes screen (codes hidden) For 2FA exemptions and resets, see Chapter 9.
1.9 Management access: allowed management networks
SSH and the web interface accept new connections on the management interface only from the listed networks. The host firewall denies everything else by default.
To change the list from the panel (admin only):
- Open Network Settings → Access & TLS.
- On the Management access card, press Edit.
- Under Allowed networks (one per line; IP or CIDR), enter one IP or CIDR per line. The Your address line shows the address your browser comes from; it must be in the list, otherwise saving is refused. An empty list means any source on the management interface (not accepted in single-port mode).
- Pick a time under Restore the previous list unless confirmed within (60, 120, 300 or 600 seconds; default 120).
- Press Apply. The new list takes effect immediately and the browser confirms it automatically from a new connection. If a new connection cannot be made, the previous list comes back by itself when the time runs out (protection against locking yourself out).
- While a change is pending, the card shows Waiting for confirmation with Confirm and Restore previous list buttons.
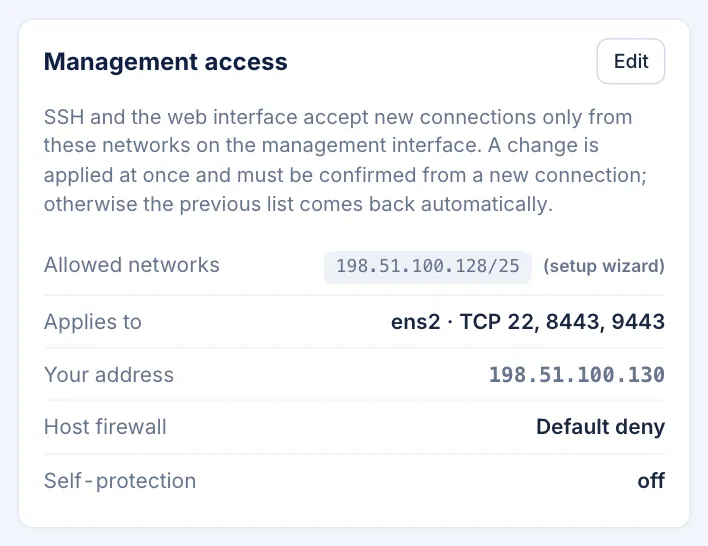
Network Settings → Access & TLS → Management access card — allowed networks, "Your address", firewall state 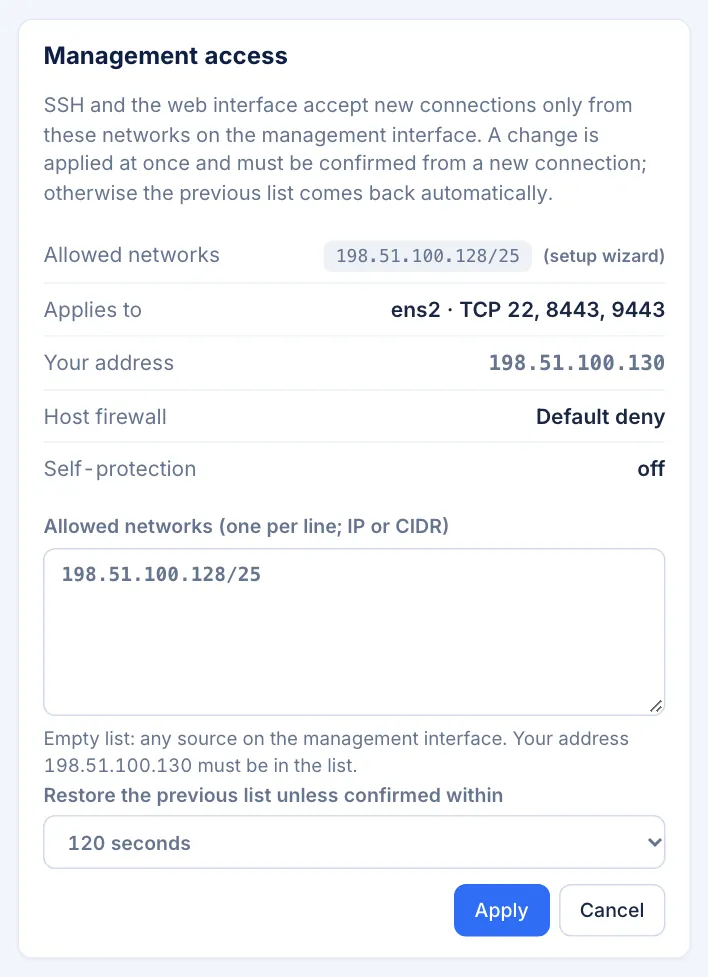
Management access edit form — one network per line, confirmation time selector, Apply The card also shows the interface and ports it Applies to, the Host firewall state, the self-protection mode, the last change and the last rollback.
From the console: mgmt-access show, mgmt-access set <cidr>..., mgmt-access confirm, mgmt-access cancel. If you lost remote access, fix it from the physical console (or the iDRAC/iLO console) with mgmt-access set <cidr>... -no-confirm (-no-confirm works on the console only). See Chapter 13.
Limit: during a reboot, until
wsdis up (a few seconds), the initial list from the wizard applies.
1.10 Post-installation checklist
- On Overview, check that the device status is SYSTEM READY and the data port is UP.
- On Ports & Wire Pairs, check the data port's role (Data), link speed and XDP mode.
- Narrow the allowed management networks (1.9).
- Install a web certificate if needed (Chapter 5).
- Import the licence (Chapter 11). Without a licence the appliance protects at most 3 prefixes and passes at most 100 Mbps; import it before the appliance carries production traffic.
- Configure the traffic path (Chapter 3) and add the first prefixes in Monitor or Learning mode (Chapter 9).
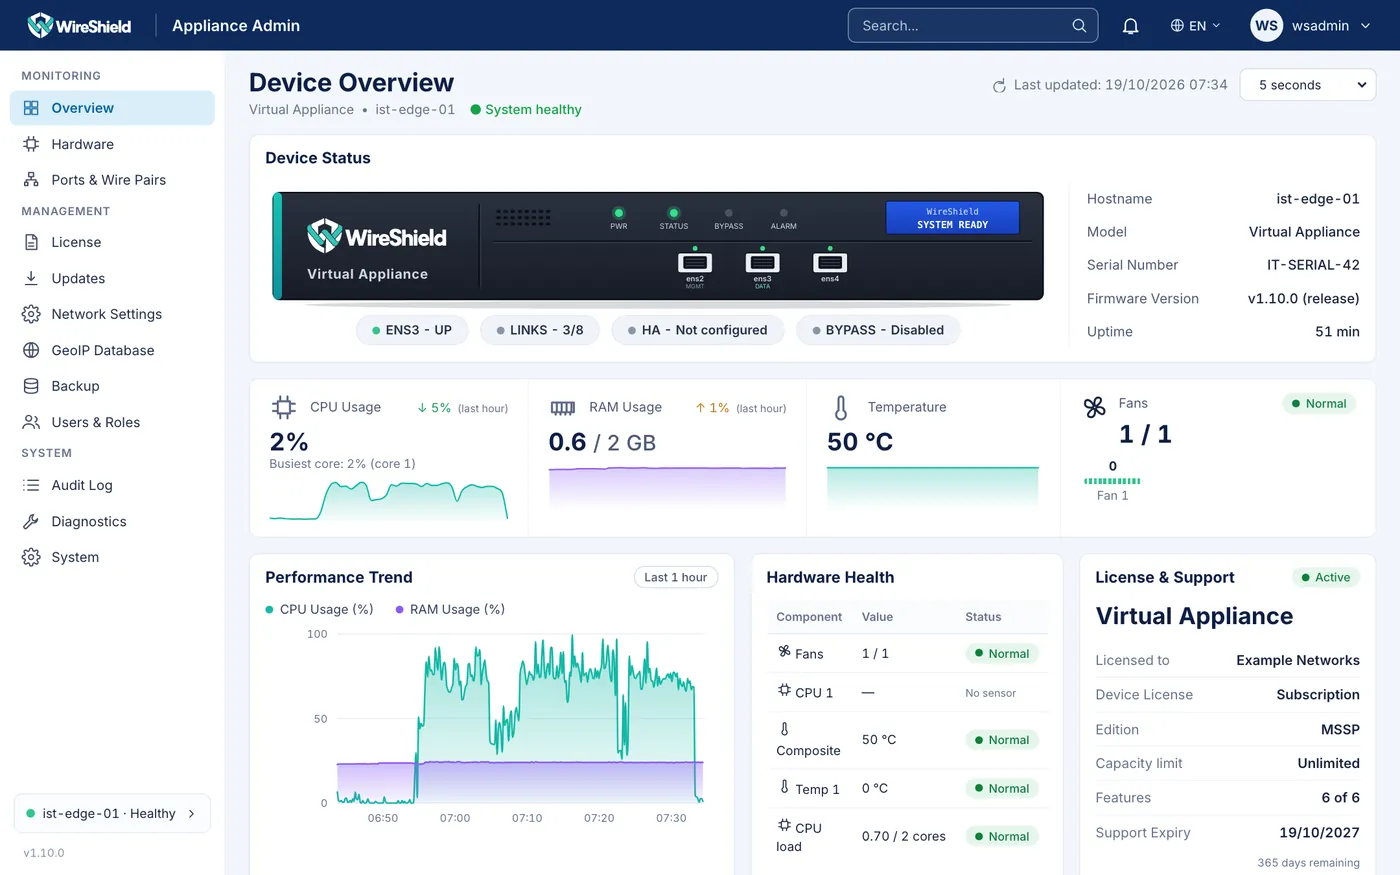
Appliance Admin → Overview — device front panel, SYSTEM READY, CPU/RAM, Hardware Health, License, Interfaces