


Portal server installation (`wsportal`)
The MSSP panel and the customer portal are published through wsportal, running on a separate internet-facing server. wsportal is a thin reverse proxy: it terminates public HTTPS, filters and rate-limits requests and forwards them to the appliance.
- Passwords, sessions, 2FA, permissions, customer data and the audit log stay on the appliance. The portal server has no database and no user store; it only holds its own client certificate and its public HTTPS certificate.
- The admin panel is never reachable through the portal. The
adminrole cannot sign in over portal connections. - The portal server and the appliance verify each other with mutual TLS and certificate fingerprint pinning. The appliance's portal ports accept connections only from the portal server's IP addresses.
- If the portal server fails, only MSSP/customer access is interrupted; protection and the admin panel are unaffected.
Internet ─ 443  ─┐                       ┌─ 9444 (customer portal)  mTLS
Internet ─ 8443 ─┴─ PORTAL SERVER ───────┤
                    (wsportal)           └─ 9445 (MSSP panel)       only from the portal server's IP
                                            APPLIANCE (wsd)
Do you need a portal server? It is optional.
- Own network (self-hosted): if you protect only your own network, you do not need it. Your staff sign in to the panel on the appliance's management address with admin, operator or viewer accounts (operators and viewers see the MSSP view). The management address stays reachable only from the allowed management networks.
- Service provider (MSSP): install it when customers or your NOC reach the panels over the internet. The appliance's management address then stays private, and operators can still sign in on the management address from the office if they prefer.
2.1 Requirements
- A Debian 13 server (2 vCPU, 2–4 GB RAM is enough) with systemd.
- A public IP address and, optionally, DNS names (e.g.
portal.example.com,mssp.example.com). - TCP 9444 (customer) and 9445 (MSSP) from the portal server to the appliance's management address.
- For Let's Encrypt: the DNS names point to this server and port 80 is reachable from the internet.
- Package:
wsportal-<version>-linux-amd64.tar.gz(same version as the appliance).
2.2 Installing the package
tar xzf wsportal-<version>-linux-amd64.tar.gz
cd wsportal-<version>-linux-amd64
sudo ./install.shinstall.sh:
- Installs the service user, directories and the systemd unit.
- Optionally installs the host firewall: 80/443/8443 open to the internet, SSH only from your management network, everything else dropped.
- At
Management network(s) allowed to SSH, enter networks that include the address you are connected from. - If you will use the Cloudflare proxy (orange cloud), answer yes to that question: 443/8443 are then allowed only from Cloudflare's ranges and port 80 stays closed.
- After the rules are applied, confirm within 60 seconds that you can open a new SSH session; otherwise the rules are removed automatically.
- Starts the
wsportal setupwizard.
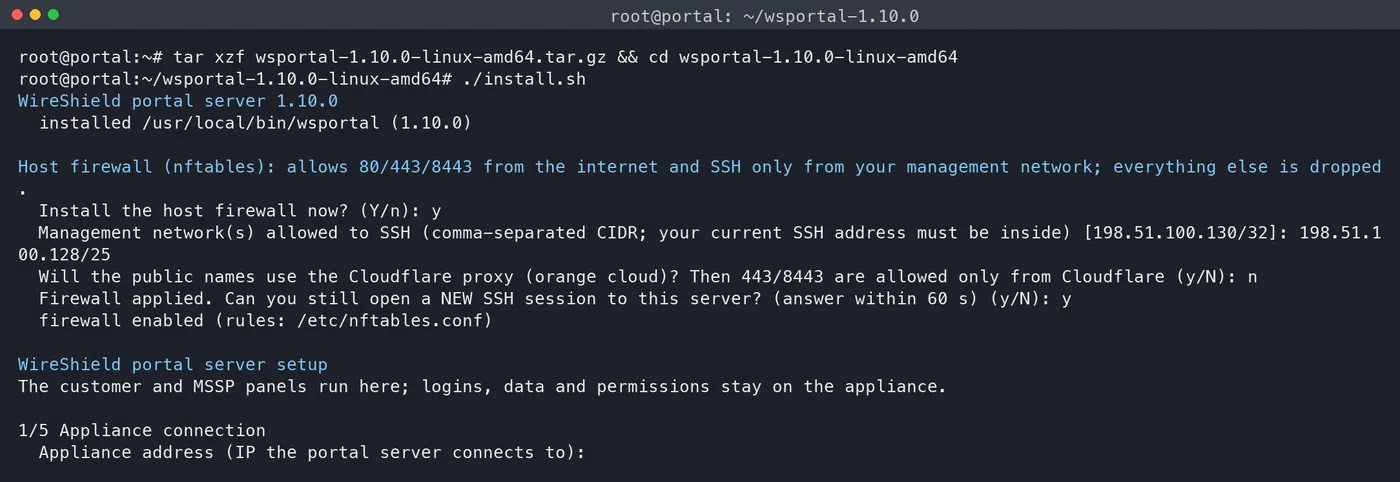
Portal server terminal — install.sh firewall questions and the 60 s confirmation
2.3 wsportal setup and pairing with the appliance
The wizard has five steps.
1/5 Appliance connection
Appliance address (IP the portal server connects to): the appliance's management address (e.g.192.0.2.10).Customer portal port on the appliance (0 = none): default 9444.MSSP panel port on the appliance (0 = none): default 9445.
2/5 Public names
Public DNS name of this server (e.g. portal.example.com; empty = IP address only)Public DNS name of the MSSP panel(default: the same name)
3/5 Pair with the appliance The wizard prints this server's client certificate fingerprint. Now, in the appliance admin panel:
- Open Network Settings → Portal & Multi-PoP.
- On the Portal server card, fill in:
- Customer portal port (0 = off):
9444 - MSSP panel port (0 = off):
9445 - Portal server IP addresses (one per line): the portal server's IP (e.g.
198.51.100.20) - Portal client certificate fingerprints (one per line, from 'wsportal setup'): the
SHA256:…value shown by the wizard - Press Save. The listeners start without restarting the appliance; the firewall permission is added automatically.
- Copy This appliance's certificate fingerprint from the same card with Copy and paste it at the wizard's
Appliance certificate fingerprint (from the panel)question.
The wizard checks both directions over a real mTLS connection and prints OK (the appliance accepted this server and its certificate matches). On failure it explains why (port closed, fingerprint mismatch, client refused).
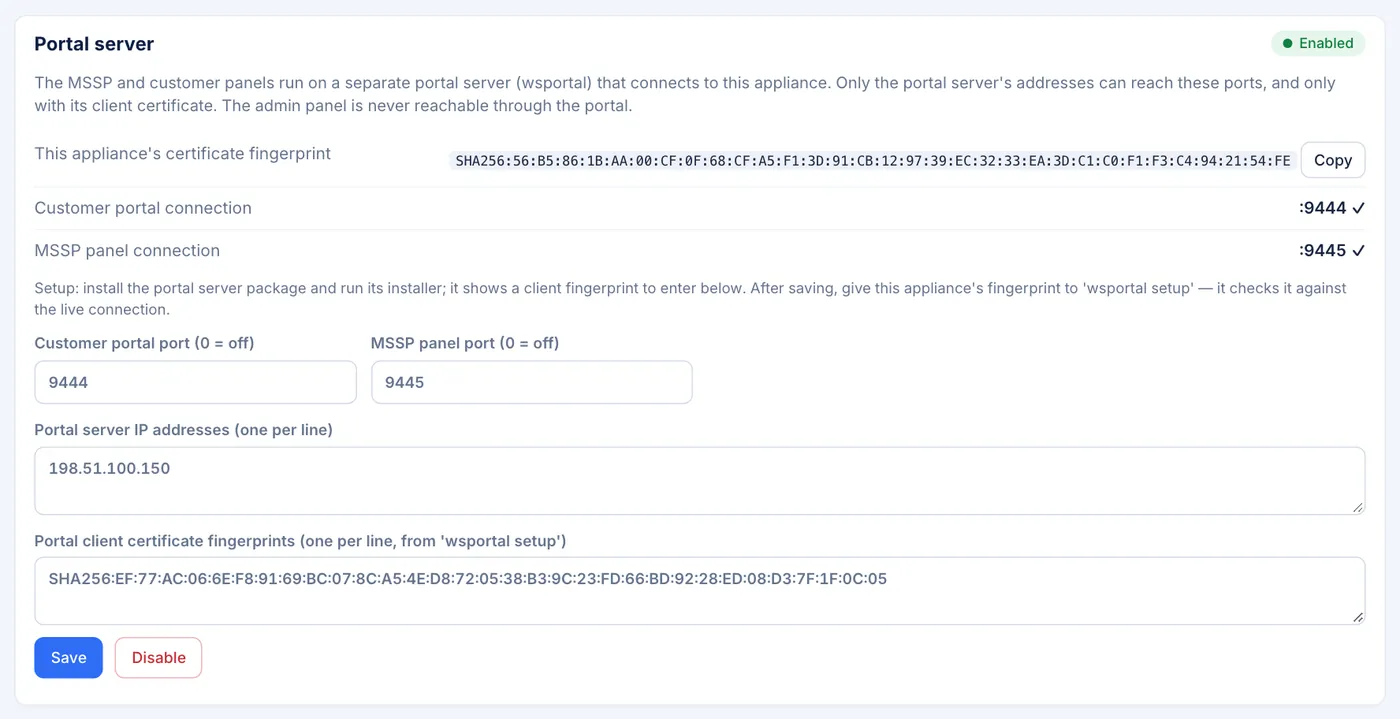
Network Settings → Portal & Multi-PoP → Portal server card — ports, IP addresses, client fingerprint, appliance fingerprint with Copy button 4/5 HTTPS certificate
- Answer yes to
Get a free Let's Encrypt certificate for … ?to obtain a certificate; it renews automatically 30 days before expiry.E-mail for certificate expiry notices (optional)is asked. - Answer no to keep a self-signed certificate (browsers warn); you can change it later with
wsportal cert(2.5).
5/5 The configuration is written under /etc/wsportal and the service is enabled and started.
Run sudo wsportal setup again at any time to change the settings. Non-interactive flags: -appliance, -customer-port, -mssp-port, -portal-name, -mssp-name, -appliance-fp, -letsencrypt / -no-letsencrypt, -cloudflare / -no-cloudflare, -email, -yes.
2.4 Addresses
- Customer portal:
https://<name>/ - MSSP panel:
https://<name>:8443/(or:443when only the MSSP panel is served)
Users with the operator and viewer roles sign in to the MSSP panel; tenant users sign in to the customer portal.
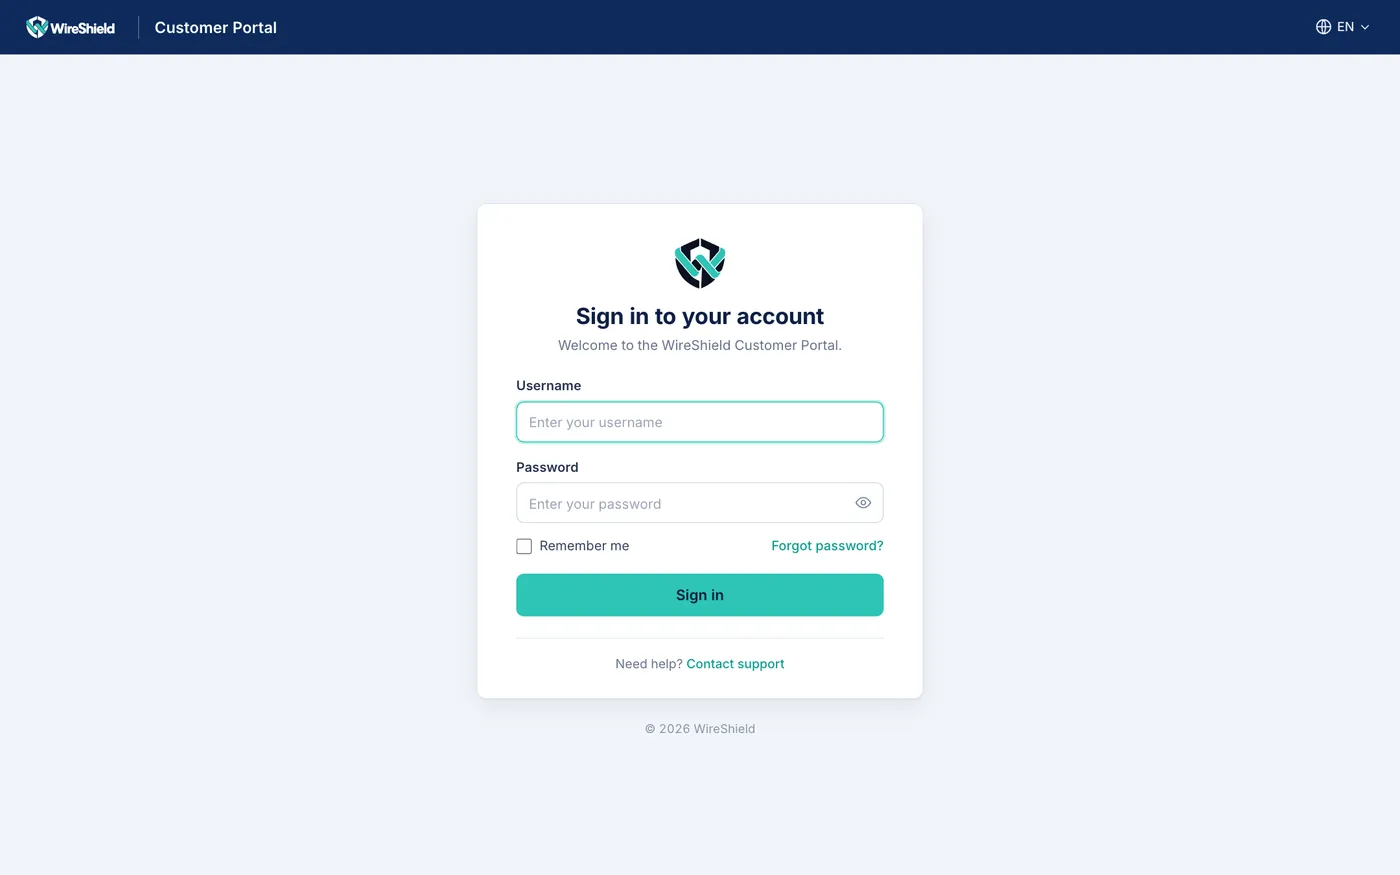
Customer portal login page ("Welcome to the WireShield Customer Portal.")
2.5 Certificate commands
| Task | Command |
|---|---|
| Show the certificate | wsportal cert status |
| Let's Encrypt | wsportal cert letsencrypt -domain portal.example.com[,mssp.example.com] [-email you@example.com] |
| Your own certificate | wsportal cert install -cert chain.pem -key key.pem (or -pfx file.pfx -password …) |
| Back to self-signed | wsportal cert self-signed |
The running service picks up changes automatically (if needed, systemctl reload wsportal).
2.6 Behind the Cloudflare proxy
To hide the portal server's address and put Cloudflare's protection in front of it:
- Answer yes to the Cloudflare question in
install.sh(443/8443 only from Cloudflare's ranges; list them withwsportal cloudflare-ips). - Answer yes to
Do … use the Cloudflare proxy (orange cloud)?inwsportal setup(or-cloudflare). The service then takes the visitor address fromCF-Connecting-IPonly on connections from Cloudflare and refuses direct requests with 403. Rate limits, login lockouts and the audit log use the real visitor address. - In Cloudflare, set SSL/TLS mode to Full (strict), create an Origin Certificate for the names and install it:
wsportal cert install -cert origin.pem -key origin-key.pem. - To override Cloudflare's ranges, put one CIDR per line in
/etc/wsportal/cloudflare-ipsand runsystemctl restart wsportal(update the firewall too).
2.7 Upgrading
Unpack the new package and run sudo ./install.sh. Only the binary is replaced and the service restarted; the configuration is kept. Upgrade the portal server to the same version as the appliances.
2.8 Operations
| Situation | Action |
|---|---|
| Appliance certificate changed | Add the new fingerprint to /etc/wsportal/appliance-pins (keep the old one until it works), systemctl reload wsportal. |
| Portal server compromised | On the appliance, remove its fingerprint on the Portal server card and Save; access and open connections are cut immediately. Or press Disable to turn off the portal connection completely. |
| Logs | journalctl -u wsportal (method/path/status/client; passwords, cookies and CSRF tokens are never logged). |
| 502 errors | The appliance is unreachable or a fingerprint does not match (see the log). |
Note: changing the appliance's web certificate (Chapter 5) does not affect the portal connection; the portal server pins the appliance's unchanged internal certificate.